Example - Create a Dragon Head
The first step is to take advantage of the 2D Drawing
We begin to draw a dragon's head profile, Select the Drawing Tool from the Construction
Tool Set. You will be given a selection of 2D Drawing Tools. Use the Polyline selection. If you are not really a designer, you can scetch the profile onto a piece of paper and use it with a graph pad, or scan it in and use the image as a background for tracing. (Or find an image of a dragon head!) To draw the dragon's head profile in the best way, toggle from perspective to orthogonal mode with the perspective icon in the control panel. It is the icon that is 4th from the left (Sphere and Pyramid).
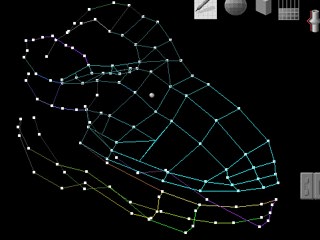
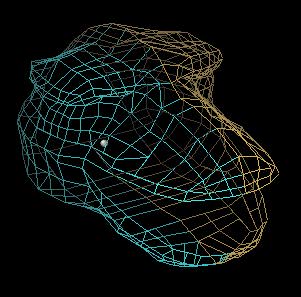
You can set a custom short-cut with a key (the mine is F8) because this function is used often. Check the User Guide on how to do this. If your drawing is too large or too small, use the zoom window (Doll figure in a frame) or the zoom extent (Doll figure on a grid) from the control panel. While zooming, the current modeling tool remains active. For the best results, draw slices of the profile. For example, a 2D outline of the head, 2D outlines of the cheek bones, eye areas, nose areas, etc. The better the profile, the better the mesh and the less work to do later! Now toggle into perspective mode and create perpendicular curves. To snap them with my first curve, I use the shift key to constraint the first point of the new curve to the nearest point of the existing curve. Like this, I make a coarse lattice to get a first idea of my shape. On these illustrations, you will see 3 different views to see this first project. Notice that I'm only doing half of the head. I'll use a mirror tool later to get both sides!
I will continue to draw curves, only with the dawing tool. They will be connected together by using the shift key.
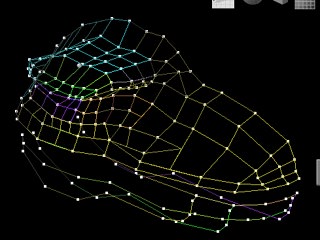
Now, one of the moments I like! With the Surface extract tool, we begin to fill our meshes. Here too, I use the shift key to connect my faces to the curves. I will make faces with 4 edges, and with 3 edges in the corners. The working mode is: click on 4 points, validate to create a face, click on 4 points, validate to create an other one╔
If I have to stop, I will create an other set of faces I can weld with the first ones.
Sometimes, I launch a rendering or display my object in OpenGL mode to get a good idea of my shape. I turn around the shape with the arrow keys, Zoom in with the 3 key, or Zoom out with the . key as I need. This is a great quality of Amapi, and with the time, you type on the keys without watching your fingers.
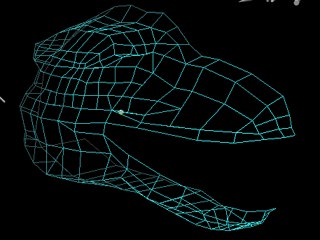
Like this, I will create the top of my dragon head. Sometimes, the curves didn't have points enough: I add points with the function "add a point to a curve" into the Tools/More tools menu. It happens may curves have errors. I move my points with the stretch or mold tools. If I have to connect a point with another one, I use the shift key. If I must move a point following an axis, I toggle the axis with the space bar. When the faces are done, I hide the 2D curves, to better see my dragon head. The curves are not deleted. I can show them with the Show tool if I want. Now, I can weld all my faces But I've done a mistake : the mouth of my dragon is not enough opened. Later, it must shows its terrific teeth. No problem! We are now modifying this with the modeling tools.
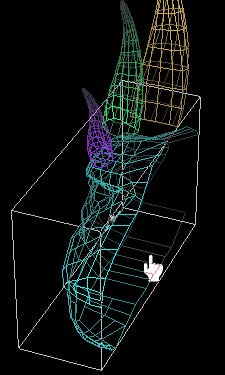
I will select the lower jaw of my dragon. To do this, I toggle form the wand to the lasso and I select the points to be modified. The lower part of the mouth is selected. I take the rotation tool and I set my rotation axis (Option key, and click on Mac, or mouse's right hand button on PC). I can now rotate this part of the jaw. My dragon opens its jaw now, like you can see it on this picture. Welding to halves parts is to model only one! Easy to do: With the mirror 3D tool, I mirror the half dragon's head Select the 3D Mirror tool, a bounding box appears on the half dragon's head. Click on the a bounding box side where you want to see the second half. That's done!
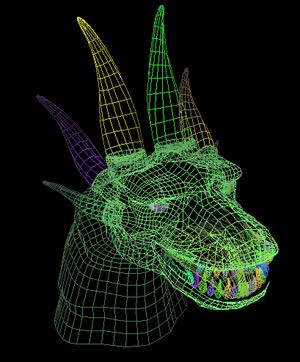
You just have to weld the 2 halves together, to get one. But before, a rendering to see this head.
and after...? After, you have to be patient╔ You have to make the horns, then placing them on the dragon's head and they must seem to going out from the head. You have to suppress some faces of the head and paste instead some parts sculpted from the horns section. This is a big job, but when it is finished, this looks good. You will have to smooth the head, to stretch on faces with the mold tool to make nostrils, and some wrinkles╔ |

 Tools to provide an profile of the
Dragon Head. These will be used with the Surface Extract Tools to create the complex
mesh.
Tools to provide an profile of the
Dragon Head. These will be used with the Surface Extract Tools to create the complex
mesh.